
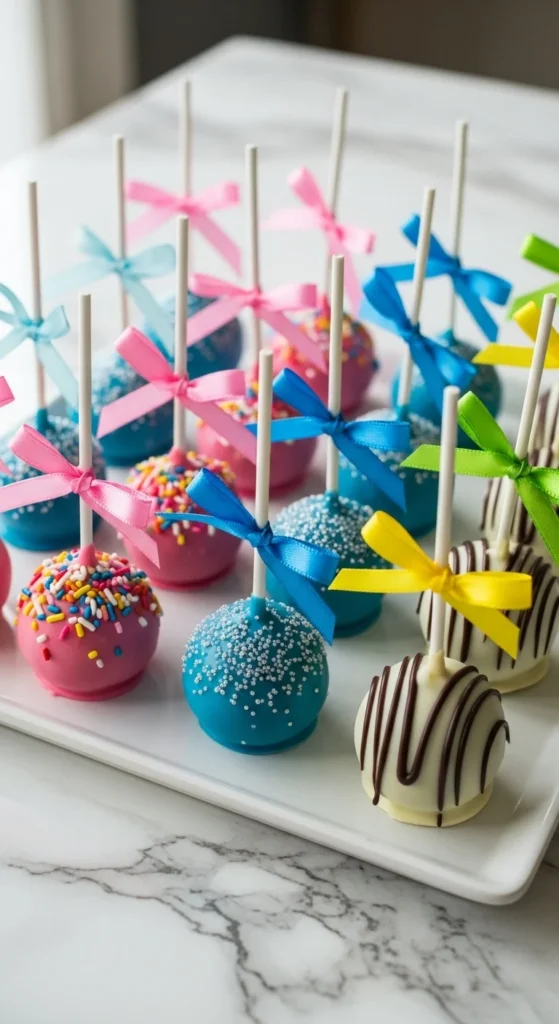
There’s something magical about cake pops — they’re cute, bite-sized, and make any occasion instantly more fun. Whether you’re throwing a birthday party, planning a bake sale, or just want to surprise your family with a sweet treat, cake pops are the perfect choice. The best part? You don’t have to be a professional baker to make them look (and taste!) amazing.
What You’ll Need
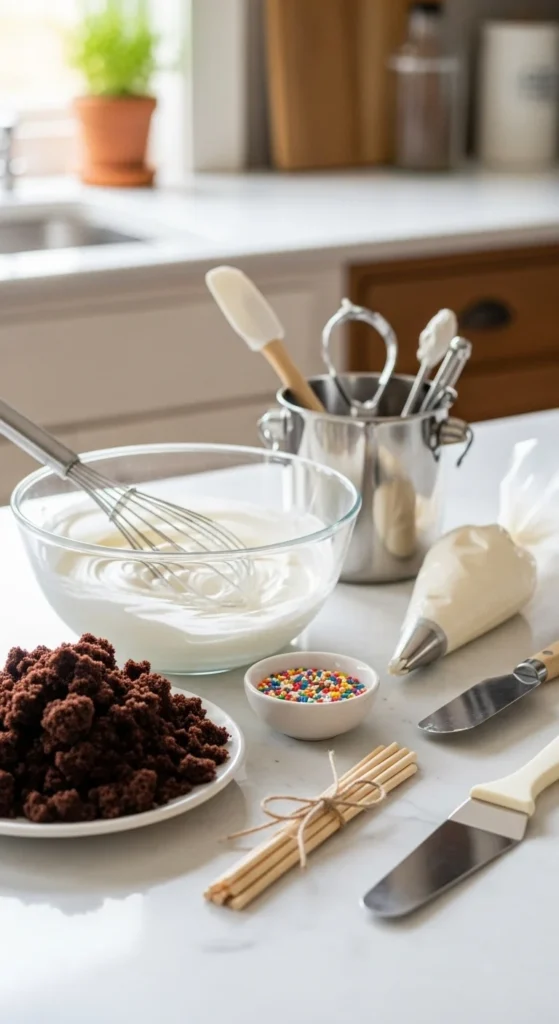
Before we dive into the fun part — rolling, dipping, and decorating — let’s gather your ingredients and tools.
Ingredients:
- 1 baked cake (any flavor: chocolate, vanilla, red velvet, etc.)
- ½ cup of frosting (store-bought or homemade)
- Candy melts or chocolate coating
- Sprinkles, crushed nuts, or edible glitter (for decoration)
Tools:
- Mixing bowl
- Cake pop sticks or lollipop sticks
- Baking sheet
- Parchment paper
- Styrofoam block (to hold pops upright while drying)
Step 1: Crumble and Combine
Start by crumbling your baked cake into a large mixing bowl. You want the texture to be fine — like breadcrumbs. Next, add frosting one spoonful at a time until the mixture feels like moist dough. The goal is to have just enough frosting to make it stick together without becoming mushy.
👉 Pro Tip: If you’re unsure, start with less frosting. You can always add more, but you can’t take it out once mixed!
Once mixed, use your hands to roll the dough into small, even-sized balls — about the size of a golf ball. Place them on a baking sheet lined with parchment paper.

Step 2: Chill and Insert Sticks
Refrigerate the cake balls for about 30 minutes (or freeze for 10–15 minutes if you’re in a hurry). This helps them firm up so they don’t crumble during dipping.
While they chill, melt a small amount of candy coating. Dip the tip of each cake pop stick into the melted coating, then insert it halfway into a cake ball. This little trick keeps the stick securely in place once it sets.
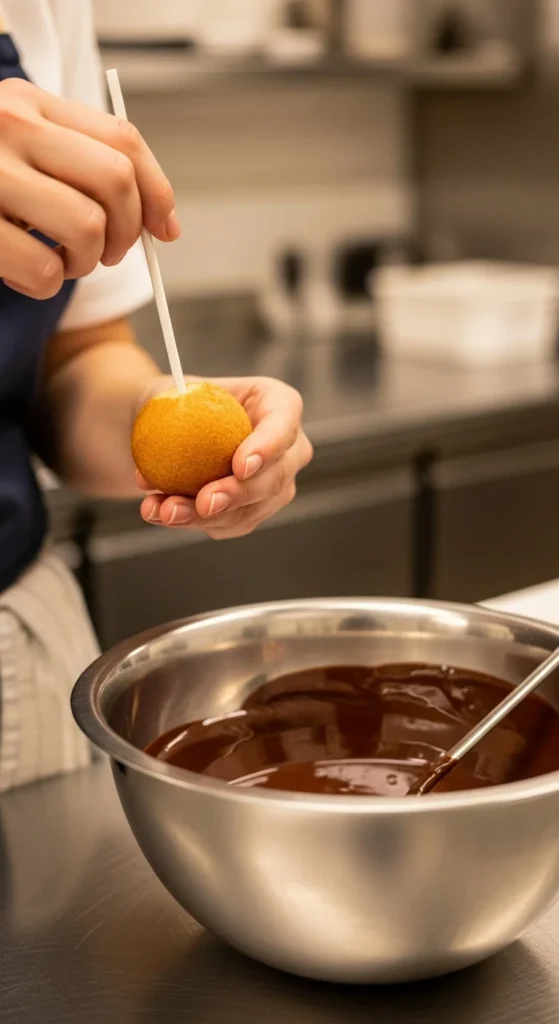
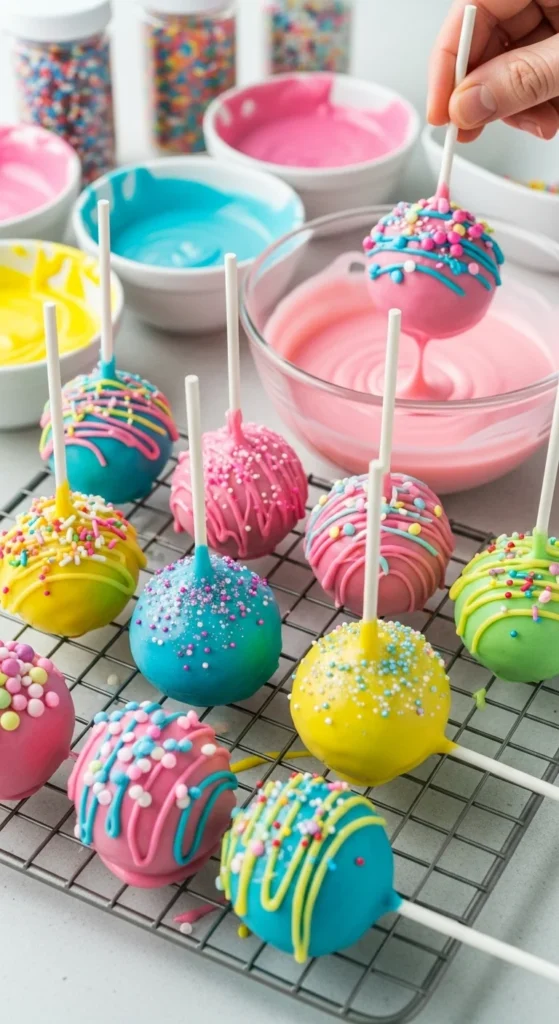
Step 3: Dip and Decorate
Now comes the best part — dipping and decorating!
- Melt your candy melts or chocolate according to the package instructions.
- Hold each pop by the stick and dip it gently into the melted coating.
- Let the excess drip off by lightly tapping the stick against the bowl.
Before the coating sets, sprinkle on decorations or roll the pops in crushed nuts, coconut, or edible glitter.
👉 Tip: If your coating is too thick, add a teaspoon of vegetable oil or shortening to thin it out for smoother dipping.
Step 4: Let Them Set
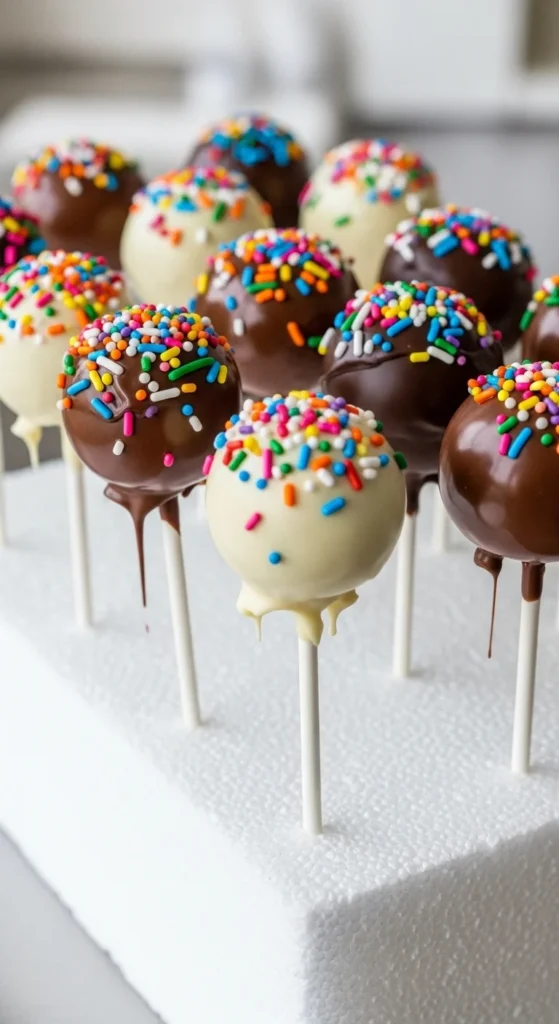
Stick the decorated pops upright into a Styrofoam block or a tall glass to let them dry completely. This ensures the coating hardens evenly without smudges.
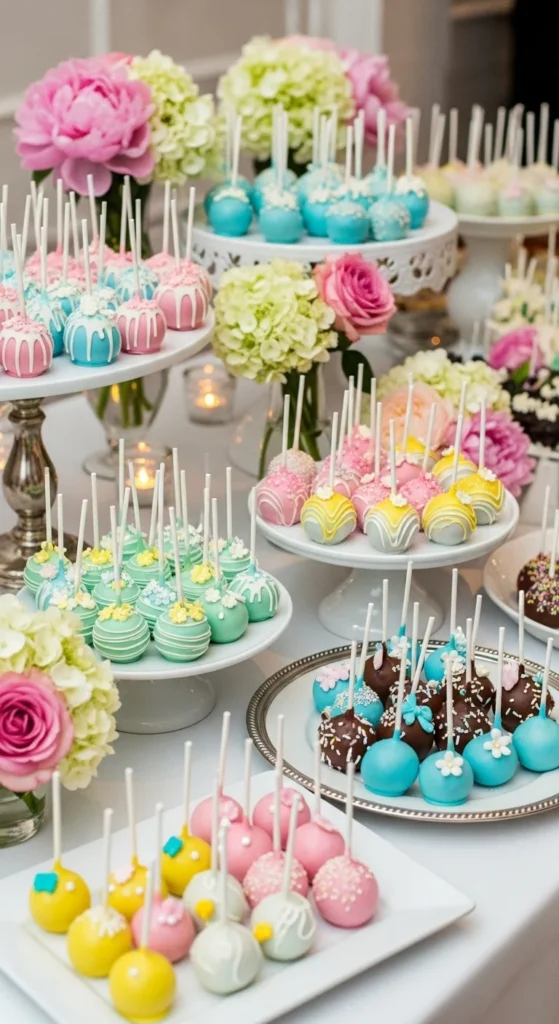
Once dry, you can wrap them in cellophane bags with ribbons for gifting, or display them on a dessert table.
Creative Variations
Want to mix things up? Try these fun ideas:
- Red Velvet Pops: Dip in white chocolate and top with red crumbs.
- Funfetti Pops: Use confetti cake and rainbow sprinkles for a birthday vibe.
- Oreo Pops: Crush cookies into your batter for an extra crunch.
- Seasonal Pops: Decorate with Halloween or Christmas themes — think orange drizzle or candy cane bits!
Troubleshooting Tips
Even experienced bakers run into small hiccups. Here’s how to fix them:
- Cake balls falling off sticks? They’re too soft — chill longer before dipping.
- Cracked coating? The temperature contrast between cold cake and hot chocolate is too high. Let the pops sit a few minutes before dipping.
- Thick coating? Add a touch of oil to smooth it out.
The Sweet Finale
Cake pops are not just desserts — they’re edible joy on a stick! From birthday parties to baby showers, they’re always a hit. Plus, once you master the basic technique, the decoration possibilities are endless.
So, grab your sprinkles, roll up your sleeves, and start creating your own little bites of happiness.
✨ Save this recipe for later and share it with your baking buddies! ✨

Leave a Reply