
Royal icing is the secret behind those picture-perfect cookies that look like they came straight from a bakery window. It’s smooth, glossy, and can be shaped into the most intricate designs — from delicate lace patterns to festive snowflakes. Whether you’re decorating holiday cookies, wedding favors, or just getting creative in the kitchen, learning to pipe royal icing is a skill that transforms your baked goods into edible art.

What You’ll Need to Get Started
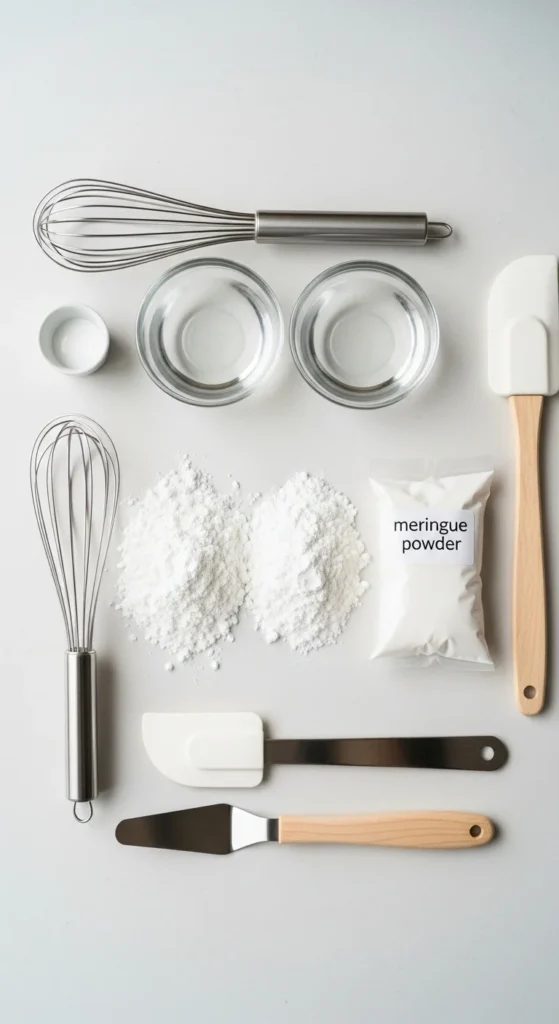
Before you start piping, gather the right tools and ingredients. Having everything ready makes the process much smoother (and a lot more fun).
Essential Ingredients:
- 3 cups powdered sugar (sifted)
- 2 tablespoons meringue powder (or 1 egg white, if preferred)
- 4–5 tablespoons warm water
- ½ teaspoon vanilla or almond extract (optional, for flavor)
Tools You’ll Need:
- Mixing bowl and electric mixer
- Piping bags (disposable or reusable)
- Piping tips (round #2 or #3 for outlining, smaller for detail work)
- Couplers (optional, but helpful for switching tips)
- Toothpicks or scribe tool
- Parchment paper and cookie sheets
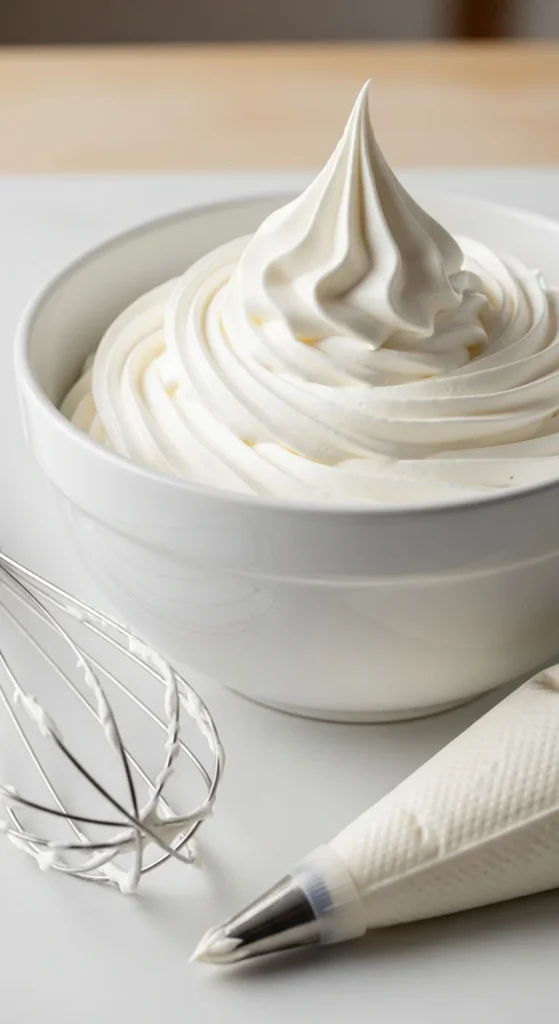
Step 1: Make the Perfect Royal Icing
The base of royal icing is simple, but consistency is everything.
- Beat your ingredients.
Combine powdered sugar, meringue powder, and water in a large bowl. Start mixing on low, then increase speed to medium-high for about 5 minutes. The icing should form stiff peaks — glossy and thick. - Adjust the consistency.
- For outlining, use stiff icing (think toothpaste consistency).
- For flooding (filling in large areas), thin it out by adding a few drops of water at a time until it runs smoothly off a spoon.
- For details, use medium consistency — something between the two.
- For outlining, use stiff icing (think toothpaste consistency).
- Cover when not in use.
Royal icing dries fast! Keep unused icing covered with a damp cloth or plastic wrap to prevent crusting.
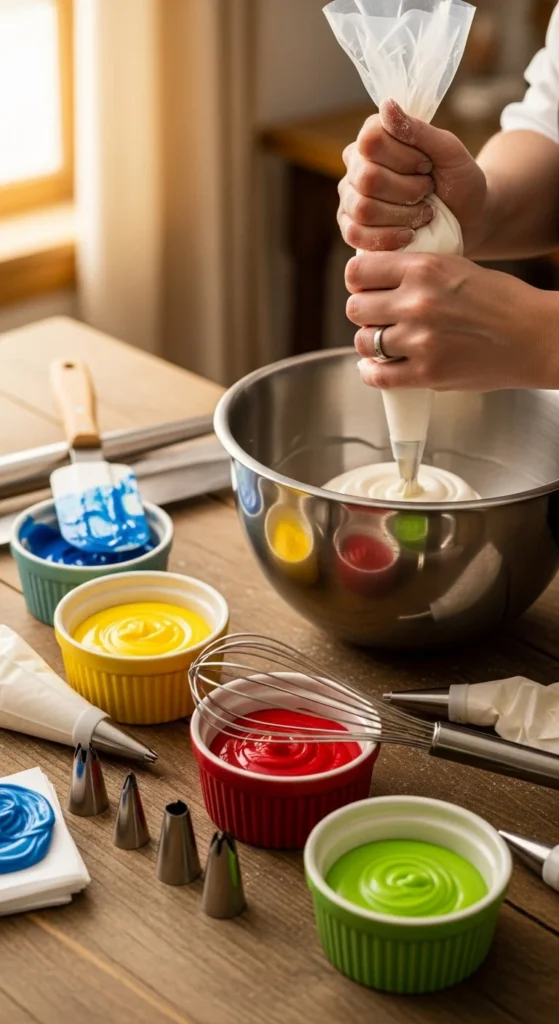
Step 2: Prepare Your Piping Bags
Filling your piping bag correctly can make or break your decorating session.
- Fit the bag with a coupler and tip (if using).
- Fold down the top of the bag to make a cuff. Spoon the icing inside without overfilling (halfway is plenty).
- Twist and secure the end to keep icing from squeezing out the top.
- Test the flow on a piece of parchment paper before piping on your cookies.
Pro tip: Keep a damp towel nearby to cover your piping tips when switching colors or taking breaks. It prevents the icing from drying and clogging.
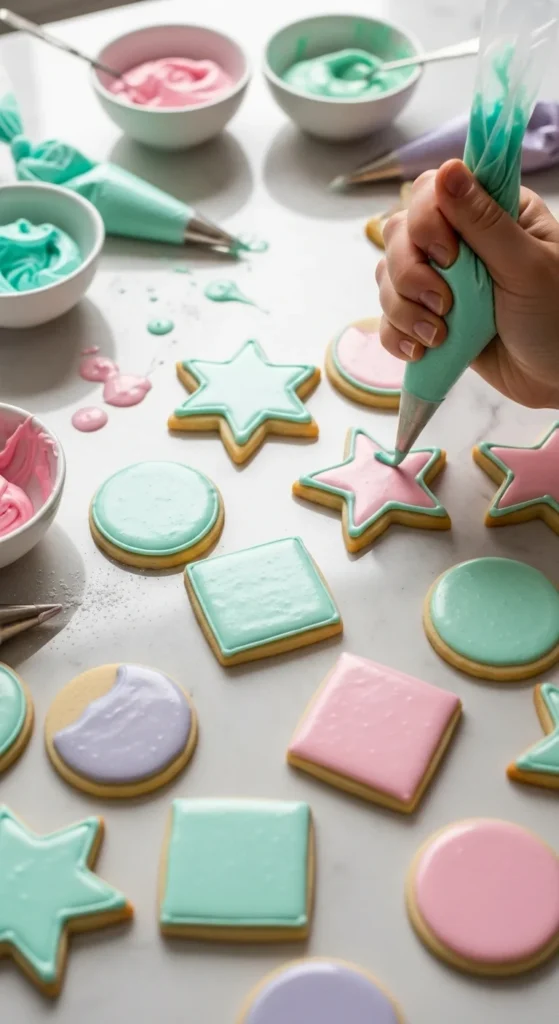
Step 3: Outline and Flood Your Cookies
Now comes the fun part — decorating!
- Outline the cookie.
Using stiff icing, carefully trace around the edge of your cookie. This creates a barrier for flooding and gives your design clean edges. - Flood the inside.
Switch to thinner icing and fill the outlined area. Use a toothpick or scribe tool to spread it evenly and pop air bubbles. - Add details.
Once the base layer sets (after about 20–30 minutes), pipe on decorative elements — dots, swirls, or even lettering. Layering designs gives a dimensional, professional look.
Step 4: Dry and Store Properly
Patience pays off when it comes to royal icing.
- Let your cookies dry completely — ideally 6 to 8 hours, or overnight, at room temperature.
- Avoid humid environments, as moisture can cause the icing to melt or lose its sheen.
- Once dry, store cookies in an airtight container between layers of parchment paper.
You’ll know they’re ready when the icing feels firm to the touch and has a beautiful, smooth finish.

Bonus Tips for Perfect Piping
- Practice makes perfect: Try piping on parchment paper before decorating real cookies.
- Use consistent pressure: Squeeze the piping bag steadily for smooth, even lines.
- Keep your tips clean: Wipe the tip frequently with a damp cloth to prevent icing buildup.
- Experiment with colors: Gel food coloring gives vibrant hues without thinning your icing.
Conclusion: Get Creative and Have Fun!
Once you master the basics, royal icing becomes your playground. From elegant wedding cookies to fun holiday designs, the possibilities are endless. Don’t worry if your first few attempts aren’t perfect — every swirl and dot helps you improve your technique.
So grab those piping bags, mix up a batch of icing, and let your creativity shine.
Save this guide for later and come back whenever you’re ready to create your next cookie masterpiece!


Leave a Reply