
Nothing beats the smell of a freshly baked pie — golden, flaky crust filled with warm, sweet goodness. But let’s be honest — the crust is often the most intimidating part! The secret? It’s simpler than you think. Once you understand how butter, flour, and a little patience come together, you’ll be crafting perfect pie crusts that rival any bakery.
Step 1: Gather Your Ingredients
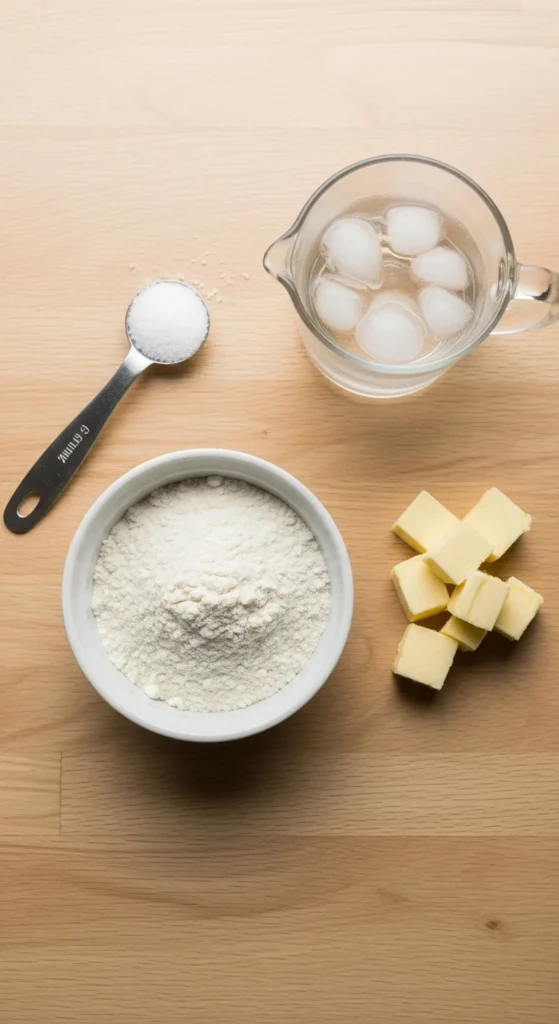
Pie crusts rely on just a few basics, so quality matters.
You’ll need:
- 2 ½ cups all-purpose flour
- 1 cup (2 sticks) unsalted butter, cold and cubed
- 1 teaspoon salt
- 1 tablespoon sugar (optional, for sweet pies)
- 6–8 tablespoons ice-cold water
Pro tip: Always keep your ingredients cold. Warm butter leads to a greasy crust — and we want flaky layers, not flat ones!
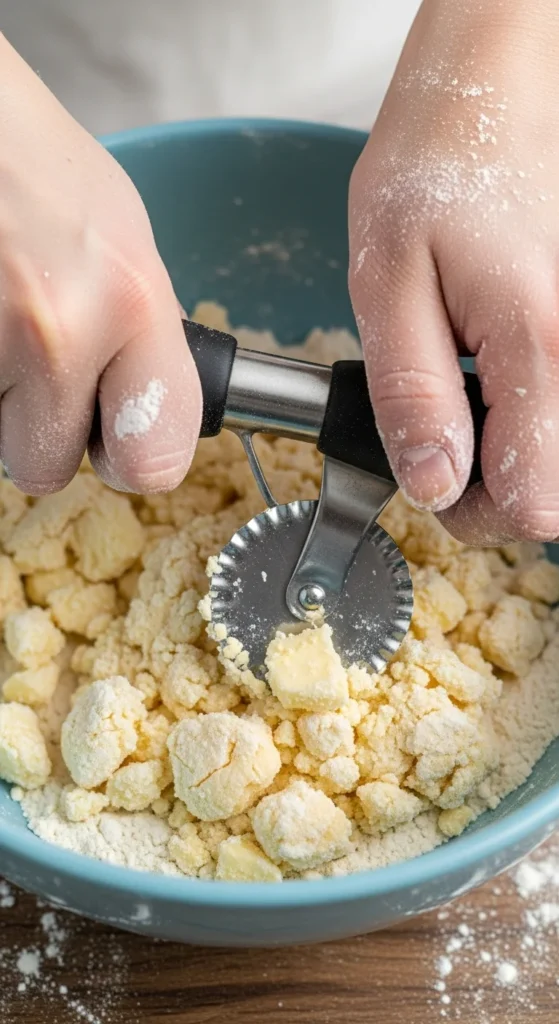
Step 2: Cut in the Butter
This is where the magic starts. You want to coat your flour with butter without melting it. Use a pastry cutter, fork, or your fingertips to blend the butter into the flour until it looks like coarse crumbs — with some pea-sized pieces still visible.
These little butter bits will melt in the oven, creating steam pockets that make the crust beautifully flaky.
Don’t overwork it! Once the butter feels too soft or sticky, pop the mixture into the fridge for 10 minutes to chill it again.
Step 3: Add the Ice Water
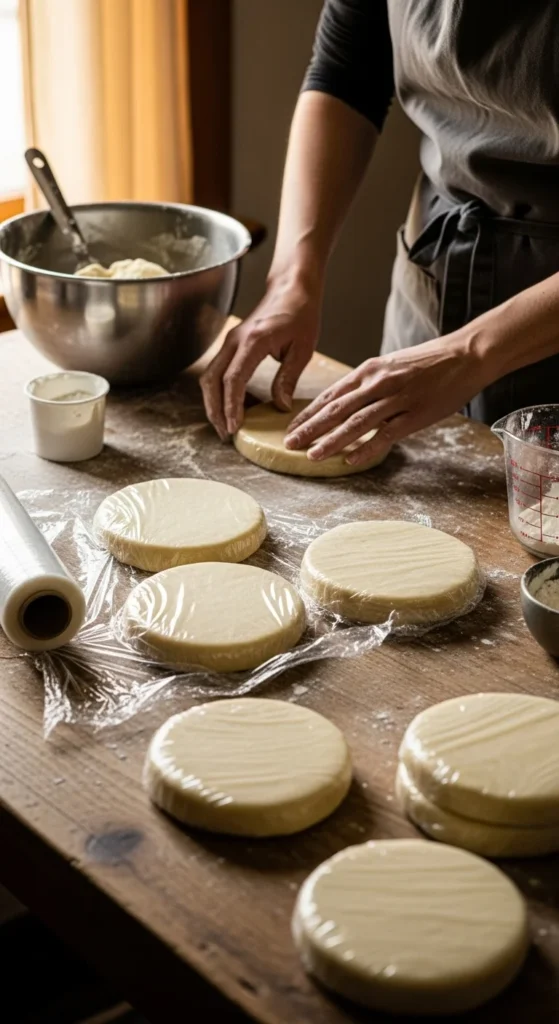
Sprinkle in ice water, one tablespoon at a time. Gently mix with a fork or your hands until the dough just starts to come together. Stop when it holds its shape when pressed — it should be moist, but not sticky.
Form it into two disks, wrap them in plastic, and refrigerate for at least 30 minutes (or up to 2 days). This resting step allows the gluten to relax, making the dough easier to roll.
Pro tip: Never pour in all the water at once — every flour brand absorbs moisture differently.
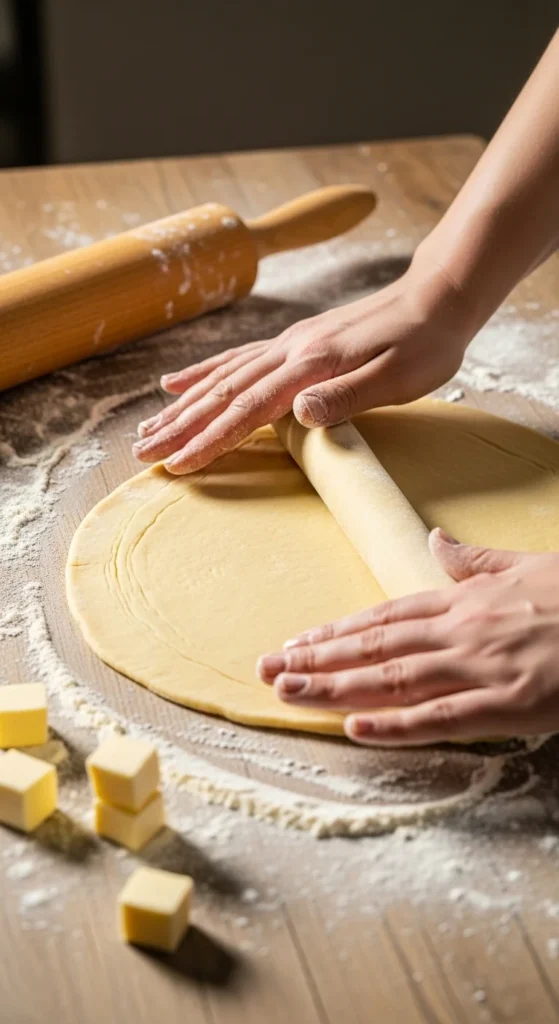
Step 4: Roll It Out Like a Pro
Lightly flour your surface and rolling pin. Start from the center and roll outward, rotating your dough a quarter turn every few rolls. Aim for a circle about 12 inches wide and ⅛ inch thick.
If the dough cracks around the edges, gently pinch it back together — it’s totally normal!
Pro tip: If your dough sticks, slide a bench scraper underneath and sprinkle more flour beneath.
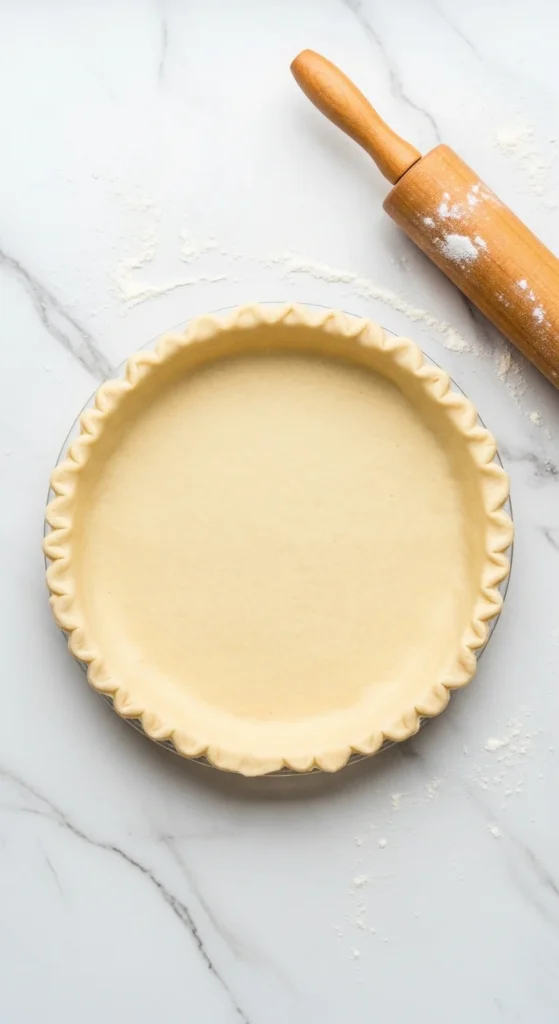
Step 5: Shape, Fill, and Bake
Carefully transfer your rolled dough into a pie dish. Trim any excess overhang to about 1 inch, then fold and crimp the edges for that classic wavy look.
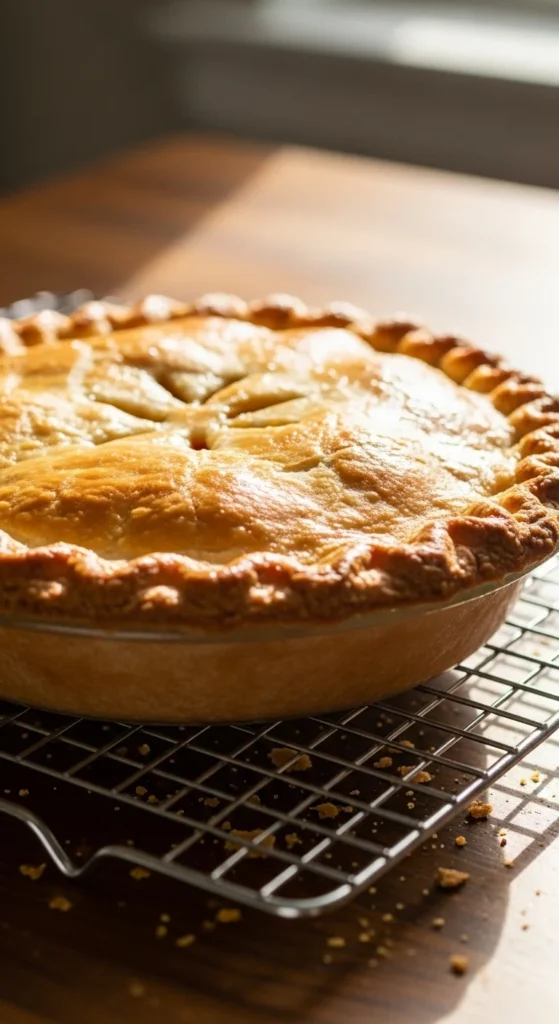
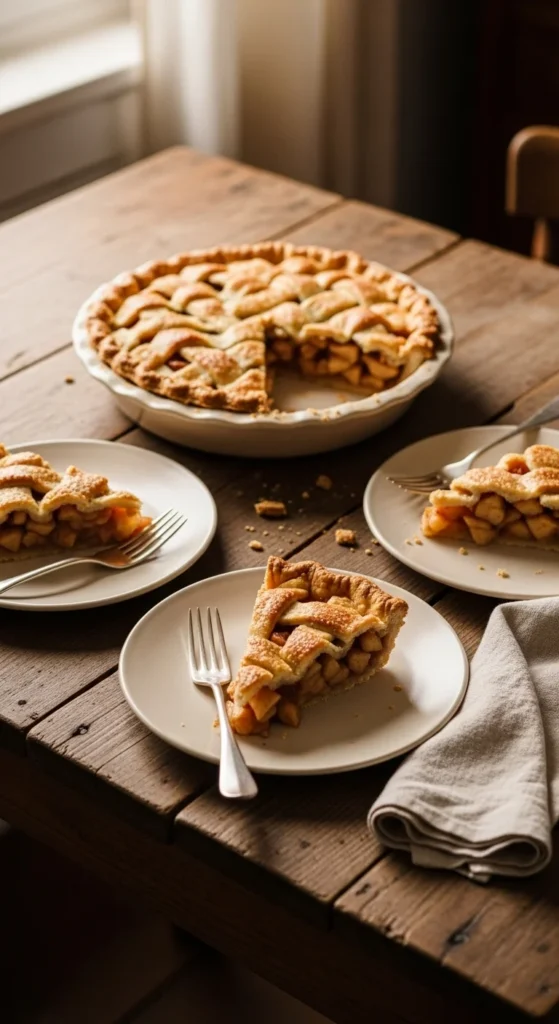
For a single-crust pie (like pumpkin or pecan), chill again for 15 minutes before baking. For double-crust pies (like apple), add your filling, top with the second layer, and seal the edges. Don’t forget to cut small vents for steam!
Bake according to your recipe, usually around 375°F (190°C) until golden brown and crisp.
Step 6: Bonus Tips for Pie Crust Perfection
- Butter vs. shortening: Butter adds flavor and flakiness, while shortening gives a tender texture. Try a 50/50 blend for balance.
- Chill everything: Cold dough = flaky crust. Warm dough = soggy crust.
- Blind baking: For cream pies, pre-bake your crust with pie weights to avoid a soggy bottom.
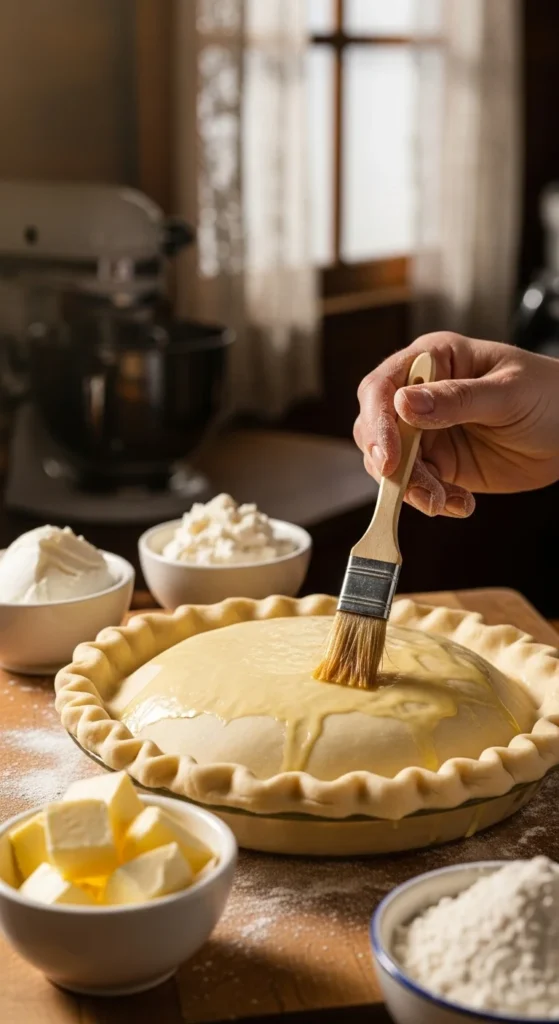
- Brush before baking: A light egg wash gives your crust that bakery-style shine.
Final Takeaway
Mastering pie crust is all about temperature, texture, and timing. Once you get a feel for it, you’ll never fear the phrase “from scratch” again.
So, grab that rolling pin and start baking! Whether it’s a holiday apple pie or a summer berry tart, your homemade crust will steal the show.
Save this recipe for later — your future pies will thank you! 🥧

Leave a Reply